How to test CenturyLink service at the NID (network phone box)
To find out if an internet or home phone connection problem is inside your home or outside in the CenturyLink network, you can check for an active signal at the "network interface device" (NID).
What's a network interface device?
The NID is the point where our outside wiring (the provider network) connects to your inside wiring (the subscriber network). Some customers call it the telephone box or network box, while technicians usually call it "the NID."
This device is about 6 by 9 inches and gray (or painted to match the house). It's most often on the outside of the home near the electric meter. Sometimes it's in the basement or attic. It's usually labeled "Network Interface Device" or "Telephone Network Interface" on the outside.
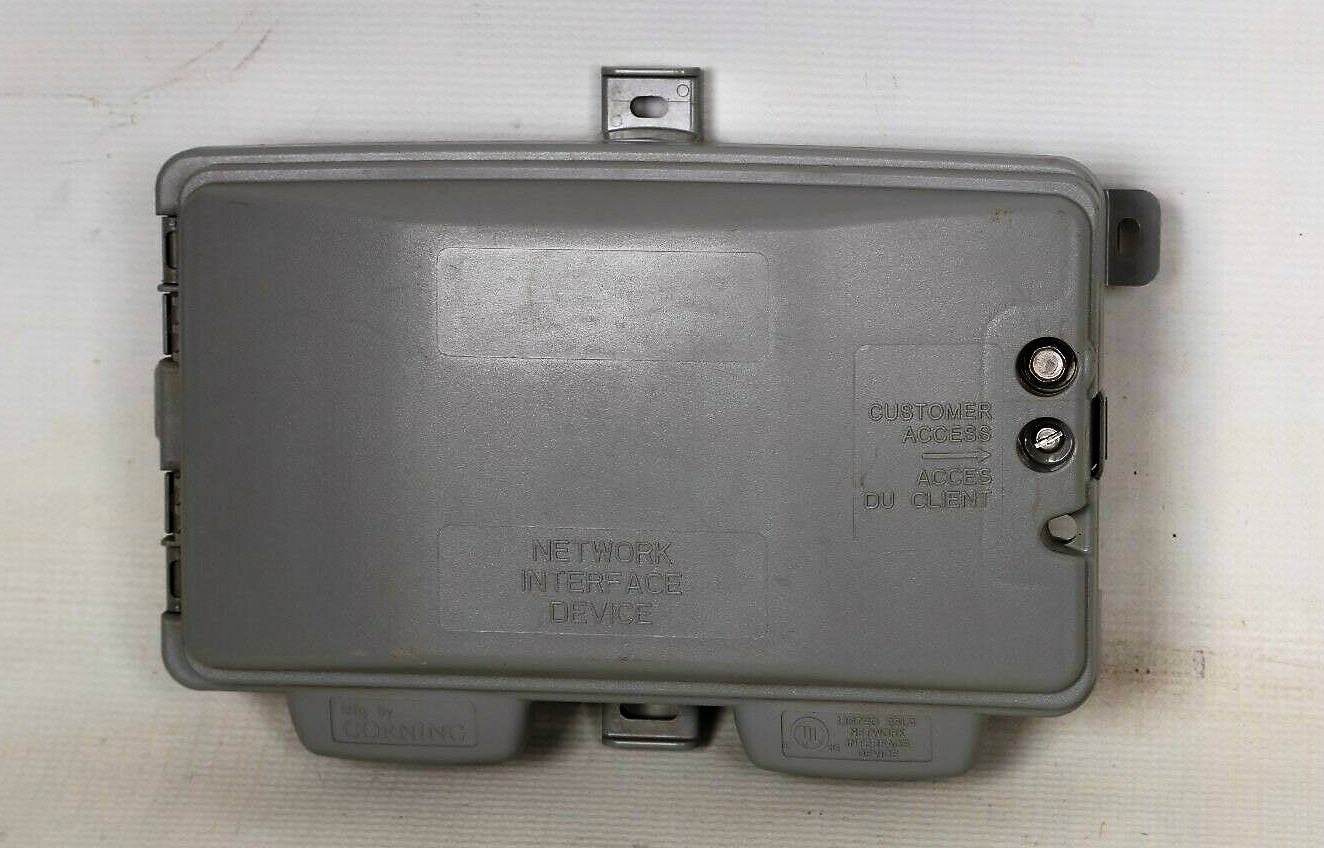
Network interface device (NID) with "Customer Access" on the side
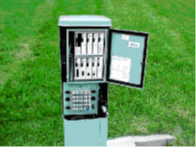
Provider access for multi-tenant housing
DO NOT OPEN
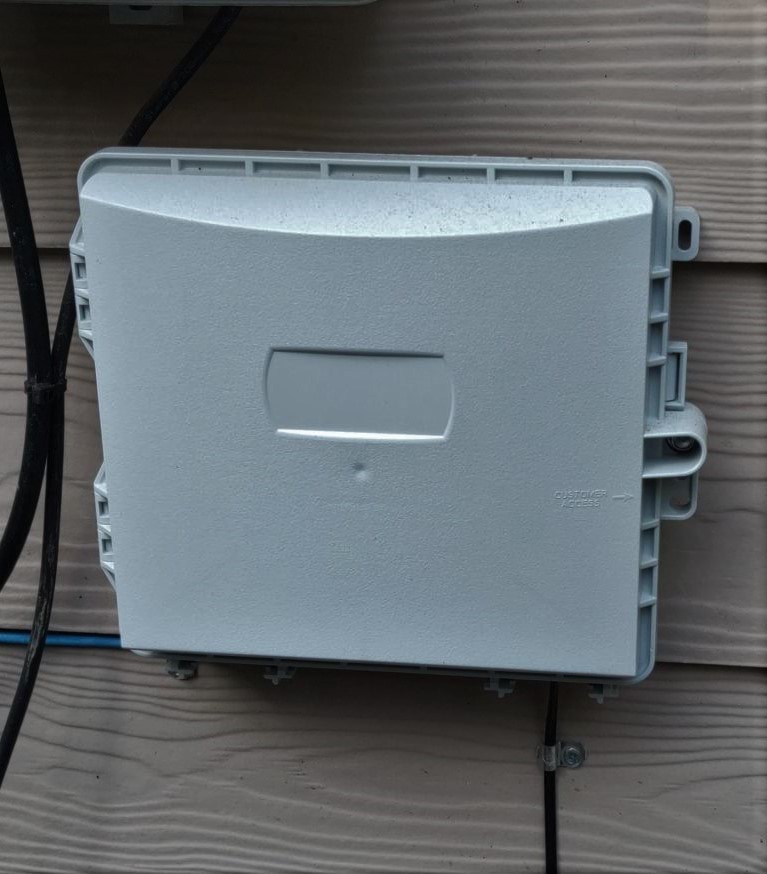
Provider access for fiber internet (ONT)
DO NOT OPEN
How to test service at the NID
- Flathead screwdriver
- If testing internet service, modem and modem cables
- If testing phone service, standard landline telephone
- Extension cord (in many cases)
Then follow the steps below:
1. Use the screwdriver to open the CUSTOMER ACCESS portion of the telephone network box.
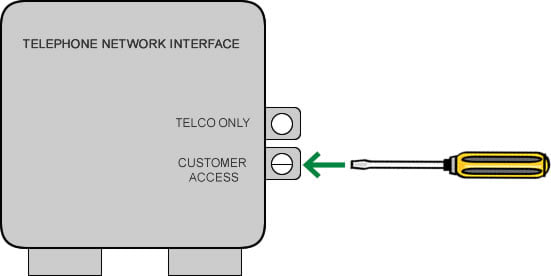
2. Locate the test jack that has a short wire plugged into it. Unplug that wire from the test jack. In some cases, there are two test jacks; you can pick either one to unplug and run your test.
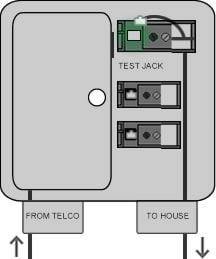
Select your service type to see the remaining instructions.
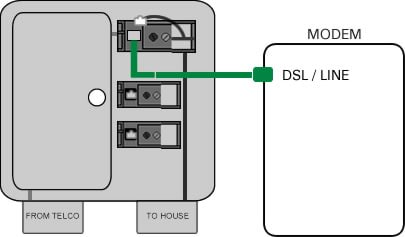
3. Plug the modem's DSL cord into the test jack and make sure the other end is plugged into the DSL or LINE port on the back of the modem.
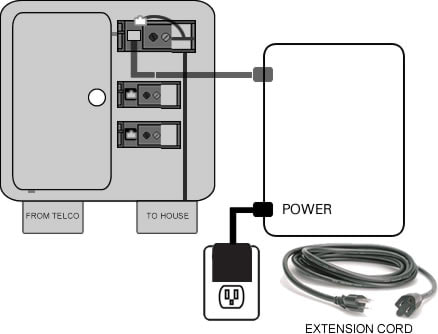
4. Plug the modem's power cord into an outlet, using an extension cord if needed. Make sure the other end of the power cord is plugged firmly into the round power port on the back of the modem.
5. Wait while your modem boots up, which may take a few minutes. Watch for the DSL light to turn solid green.
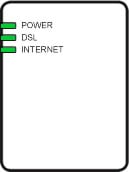
Test results: What color is the DSL light?
GREEN DSL LIGHT: The problem is most likely with the outside equipment or internet lines belonging to the CenturyLink network. Submit a repair request so that CenturyLink can fix the problem.
RED DSL LIGHT (OR OFF): The issue is most likely with your inside wiring, jacks, equipment, or modem settings. Try these common troubleshooting tips for slow internet. Or check your WiFi, as in many cases the wired internet connection is fine, and it's the WiFi signal that is sluggish.
You can also run Troubleshooter, which can diagnose common problems.
3. Plug the telephone cord into the test jack and make sure the other end is plugged firmly into the phone. Plug the phone's power cord into an outlet or extension cord.
4. Listen for a dial tone in the receiver.
Test results: Do you hear a clear dial tone?
THERE IS A CLEAR DIAL TONE at the network box: The problem is most likely inside, with your own wiring or equipment. Use Troubleshooter to get more help walking through steps to check and fix equipment.
Important! Once you're done testing, be sure to plug the original wire back into the test jack (the reverse of step 1). Then close the box cover and tighten the screw securely.
Need assistance? Contact technical support by phone or chat. We're here to help!
Top Internet Topics
-
Check for an outage -
Troubleshooting slow internet -
Speed hub -
Upgrade your service -
WiFi support -
Internet security
View all Internet topics
Top Tools
Was this information helpful?
Support topics


.png)


